
Creating responsive news stories with Webflow
NOTE: This service has since been retired and the partially completed website has been removed, as Wordpress sites in general have improved. When I have time I'll rebuild the project here.
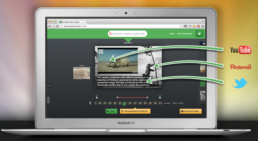
This browser-based application which allows you to visually design responsive websites came out of Beta in August this year. Instead of having to know HTML or rely on a desktop based webdesign software such as Dreamweaver, Webflow allows you to drag and drop the main elements of a website into a canvas area and then preview the website in different formats, such as tablet and smartphone or portrait and landscapes. This means that no matter what device you're viewing on you can customize the appearance quickly and easily.
In practice
I made two websites to test how easy this application was to use. Firstly, I very quickly knocked together a website ahead of an editorial meeting for a fanzine I'm working on. I based this site on a pre-designed template which already had a clear structure and just customized the text within the containers. Secondly I started to reproduce a web story from scratch, which I had previously created using Scrollkit, the Webflow version can be found here. The latter required more adaption and an understanding of how Webflow worked and although support videos exist on how to quickly put together storefront style websites, there's no guidance on how to create scrolling news stories. Having said this once I'd got my head round the various web containers, margins and padding it achieved a much clearer and legible mobile site.

How it helps you
The key really here is speed, to be able to bring together some visual ideas and even put together a microsite quickly is really exciting. And for that to be readable across devices without having to constantly test the website is brilliant. Particularly when designing scrolling news stories, it's all too easy to get the measurements wrong and lose half your audience. Also whilst you still need to understand the principles of webdesign, you no longer have to write badly formed HTML. Once you've published the website, it can be outputted as easy to install zip folders with perfect HTML and CSS.
Drawbacks
As with Scrollkit (which I also wrote about on a previous Tech Tuesday), this application comes unstuck when you start embedding multimedia into it. Compared to Scrollkit the embed is much easier, although you can't preview an embed that isn't iframe based without publishing. The hardest thing to embed was YouTube video, using the video embed it created it within a small window on the canvas. As an iframe embed it previewed fine then in the final viewing shot into the middle of the page. I could probably work out how to stop this with more time but it is frustrating. Also there's no CMS (content management system) powering these websites, so creating something that can be easily added to is problematic.
Summary
Another incredibly flexible web-based application which gives desktop software a run for its money, but needs a bit more time to mature.
Rating
![]()
![]()
![]()
![]()
![]()

Using Clipping Magic - deleting picture backgrounds without being tricky
It’s in no doubt that the Adobe suite of software is still the market leader when it comes to image manipulation. However, because they’re so powerful it can be heavy, taking a long time to load the software. A simple job such such as cutting out an image can take forever and with all the tools and options on offer, it’s difficult to remember how to do it. Clipping Magic is an browser based solution for this specific problem, currently free in Alpha.
In practice
I quickly made a logo transparent for a video that I'd been working on. The interface is very easy to use, you simply mark green on the area you wish to keep and red on the area you want removed.

Unlike Photoshop or Illustrator you can be pretty rough and ready with the area you want to remove. On an image as clear as this, the interface works out what you wish to do. Black background added below to distinguish difference.

I then tried something a bit more challenging for last week's Tech review slide and a black and white picture of Damo Suzuki.


There are more tools to help you refine or blur the edges, this was particularly useful when trying the make the coat look normal on the leopard and Damo's hair not look too "bob-ish", as Clipping Magic calls it.


With these images you need to help the algorithm out a bit more, but it's considerably easier than the magnetic lasso and wand tools in Adobe. The refinement tools are also simple.
How it helps you
Time is often of the essence and using this tool prevents the need to load Photoshop or Illustrator for a simple task. It also means you can cut out photos on any computer without the cost and time spent installing the Adobe suite.
Drawbacks
According to the website this application is free whilst still in Alpha, hopefully the cost won't be too prohibitive and a paywall doesn't impede the speed of access to this tool. If you did want to do a professional crop - something that would be used in print, it would always be better in Adobe.
Summary
A quick and easy cutting out tool, much more magic than Adobe's wand.
Rating
![]()
![]()
![]()
![]()
![]()
Putting together slick multimedia packages with Videolicious
The iOS app Videolicious was launched a couple of years ago with the idea of allowing you to quickly create multimedia stories on-the-hoof. Last week journalism and technology website Poynter revealed The Washington Post asks journalists without multimedia backgrounds, to use the app.
How it helps you
This app is great for putting together quick packages whilst out in the field, press conferences, Marches or gigs. In Poynter’s demo Andrew Beaujon uses it from a technology and journalism conference.
Once you're happy with your piece, you have the option to add licence free music and even filters. If you upgrade from the free version you can add licensed music and logos to make your video more professional. You then have the option of sending to YouTube or it can be shared directly via Videolicious’ own player and dashboard.
In practice
I created a quick dispatch based on an event I covered last week. It was relatively quick to put together, although I retrofitted it and had to spend time downloading the elements to my phone. The app requires you to do your post in one take, so I had to do quite a few retakes. This arguably, is good practice but not so good if you’re used to sorting out problems in the edit suite. Also the camera is really unflattering (especially if your shooting from a desk upward) and I was much more comfortable with just audio. A good point is that you can upload a high or lo-res version depending on whether you’ve got good phone coverage or not.
My attempt to upload to my YouTube account didn't work.
Drawbacks
Surprisingly, even though it’s a few years old, Videolicious does tend to crash. But then my iPhone is in need of an upgrade and it might deal better with images and video shot on the phone. I would have liked more of a chance to fix things retrospectively but the video can upload to a dashboard where potentially a multimedia editor could pick it up, check and re-edit if need be.
Summary
An app with real potential, but it needs practice. And possibly a recent smartphone.
Rating
![]()
![]()
![]()
![]()
![]()
Ken Blake's Excel Data Journalism Videos reviewed (and annotated)
NOTE: Video.es website is now closed
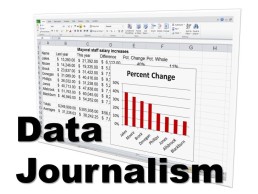
Emily Cadman from Financial Times mentioned in her talk at News:Rewired Excel is a good "gateway drug to data". This idea was also discussed extensively at the International Journalism Festival in Perugia. Dr Ken Blake from Middle Tennesse State University School of Journalism agrees and through his YouTube-based Data Journalism course, he takes you from 'the basics' to 'maximizing' Excel.
In practice
I downloaded Dr Blake's datasets for Introducing Excel and Rates ranks and filters in Excel then I loaded the videos into VideoNot.es (reviewed here). You can take a look at the timecoded notes here for Introducing Excel and Rates, ranks and filters from here. I also let Dr Blake know I was going to do this and he plans to supply these notes for all of his videos in the next few weeks.
How it helps you
Dr Blake's tutorials look at using Excel specifically for Data Journalism, and he uses examples of sources which you may use in a newsroom including crime figures and population statistics.
Drawbacks
These are drawbacks with Excel rather than the tutorials. Of course, being a Microsoft product the software is always updating and if they have a significant overhaul (as they did in 2010) then these videos will appear dated. Excel was never designed as a Data Journalism tool, rather as a small office spreadsheet system. It is worth keeping this in mind when working on more complex projects.
Summary
A set of good introductory videos to help you get around the concept of using Excel for as a way of training you for Data Journalism, something our own Times Online Data team are looking at.
Rating
![]()
![]()
![]()
![]()
![]()
Journalism Tech Review: FiRE
NOTE: Fire 2 is no longer being updated. Smartphones now have much more sophisticated recording apps inbuilt.
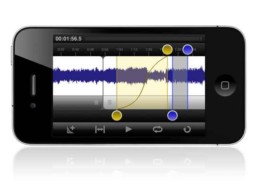
Many apps have been developed to enhance smartphones’ often impressive audio recording ability but FiRe was the first to really attempt to be a professional field recorder. Initially launched on the iPhone (at a pretty high price of £3.99) it did prove to be very reliable so much so that many commercial radio stations (including GMG) encouraged reporters to use it instead of a bulky Marantz. Last year Audiofile stopped supporting FiRe and instead offered FiRe 2 an upgrade of the recorder which required you (somewhat cheekily) to buy it for another £3.99.
How it helps you
Although there are plenty of apps on the market that are easier to use this one is not only professional but also extremely flexible. You can add your own metadata which prevents the audio getting lost and can help when adding further context to an online story. With FiRe 2 there is integration with Dropbox - blowing Dropvox out of the water by a considerable distance. A sub or producer could easier pick up a story and it is easier to configure than FTP. There are also some pretty nifty editing tools so you’re out in the field getting an interview anyway you can easily file the audio before the story. And there's Soundcloud integration which in private could be a handy archive but in public could also mean that a story could be broken on the platform.
In Practice
To test this app thoroughly, I recorded an interview using a the new app, we recorded it onto the camera microphone in an echoey dressing room whilst the interviewee ate a satsuma. The sound wave monitoring is very accurate which means you can avoid distortion. The noise quality has always been good but there’s a few more EQ settings (powered by Izotope) and extended metadata you can add before downloading. I did try editing the audio using the app but it was very fiddly, and then it crashed. I trimmed the audio (particularly the satusuma sucks) using Audacity on my computer and then uploaded to Audioboo, you get space for unlimited Boo’s on Audioboo whereas I’ve already filled my free Soundcloud account.
Drawbacks
You don’t need to have FiRe 1 installed to use FiRe 2 but, somewhat irritatingly it doesn’t incorporate the recordings you have already on the phone. There are a lot file format options on the new app but it does seem buggier than the first version.
Summary
An excellent field recorder - an average exporter - a pretty rough editor.
Rating
![]()
![]()
![]()
![]()
![]()

Journalism Tech Review: IFTTT
If This Then That (IFTTT) launched in September 2011 promising to be the “gaffer tape that holds the internet together”. This means various social media, cloud archives and even physical internet enabled products (a full list of channels here) can be connected together with simple instructions and without learning code.
In practice
Automated online activity which would require you to wrangle with the unwieldy Yahoo Pipes or the intimidating Mac Automator, is given a user-friendly interface. You can also share your favourite ‘recipes’ and allow people to use them. I use them a lot to allow for a more organic duplication of social media. For example, every image that I 'favourite' on Instagram automatically drops into Tumblr (under the Instagram tag) or when a new photo is uploaded by me to Flickr it also uploads them to a gallery on my Facebook page. Pictures are the currency of these social media channels and spreading them across platforms increases their exposure and engagement.
How it helps you
The reason I decided to post about this web application is because of the announcement last week Google is to discontinue its RSS Reader service after July 2013. Since I’ve been experimenting with Feedly as a replacement and implementing a process that doesn't leave me relying too heavily on a single provider. News stories that I like are saved to Pocket from within Feedly and then from Pocket they’re piped with IFTTT to my Delicious and Pinboard bookmarks. This way I can organise my favourite stories and primary sources without depending on one web service. There are other recipes that could help your working life such as this which (once it allows for UK calls) would let you to effectively dial in a short story. If you were sending back photos or videos from a mobile phone you could speed publish across multiple platforms or notify a desk editor automatically. You can also sync certain documents with Google Drive or even use Google Drive to collect data on a single spreadsheet which might be useful for Data Journalism.
Drawbacks
Although there are 60 active channels on IFTTT with 433,065 tasks created by users in its first year it can be frustrating when you realise that your new app is not included. Particularly disappointing for me is Google Plus’s refusal to let people automate its updates (pages or personal) or Twitter’s restriction of their API. This platform really depends on an open internet.
Summary
A simple way of controlling your web and mobile activity.
Rating
![]()
![]()
![]()
![]()
![]()
Journalism Tech Review: Learn CSS Layout
History
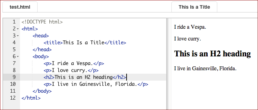
Many of you who have worked with web content management systems or your own personal blog will have a basic understanding of HTML. Just by clicking on the HTML tab or by holding down CTRL+U you can get a grasp of what is going on behind any web page. But CSS can be a mystery as it is rarely placed within HTML (called inline). CSS stands for “Cascading Style Sheet” so instructions should be entered into a separate page within a website’s directory. As Online Journalist Mindy McAdams points out the excellent web-based coding guide Codeacademy often loses people at inline. This online tutorial takes about 20 minutes to run through and very simply explains the fundamentals of CSS.
In practice
I used what I’d learnt to completely change the overall look of a Tumblr website, also to stop to the Footer shooting up to the middle of the page when viewing this website in Internet Explorer.
How it helps you
If you use any website to collect together your stories, build feature ideas or grow an online audience, then knowing the fundamentals of CSS means you can customise your site to appear more professional. A basic understanding of HTML and CSS is needed if you want to scrape any kind of website, as Classes are often used to mark-up useful information and (as explained in The Data Journalism Handbook) can help convert a web page into a usable spreadsheet format.
Drawbacks
I would have liked more opportunity to try out the code. When you try and apply the CSS there is a missing link which has to be pieced together by reading this tutorial. I realised I needed to select the class by writing and using the correct "selector". As with many of these tutorials, it’s going to slip straight out of your head if you don’t apply it a few times.
Summary
An easy to follow tutorial, which needs further joining up for application.
Rating
![]()
![]()
![]()
![]()
![]()

Journalism Tech Review: Tweetbot
History
Tweetbot took advantage of Twitter’s relatively open API to develop an iPhone native app which easily outshone their basic mobile offering. Although Twitter significantly upped its game with a redesign last year (following the acquisition of Tweetie and its coder), Tweetbot broke free from some of Twitter’s more idealistic attributes - including the patronising and advertising heavy #discover option.
In practice
You can very easily flick between multiple accounts, lists and searches. Particularly useful is Tweetbot’s “gestures” - a simple swipe and you can view replies or conversations on any tweet. Tap once to view a link, hold down to use the link or save to any number of apps, or configure triple tap options for yourself.
How it helps you
For feeding back tweets and multimedia on the move it is very good, especially with the facility to upload in the background. Also, not only can you flick between multiple Twitter personalities (for example public and private you) but you can keep track of Twitter lists. You can even turn a Twitter list into your timeline of contacts’ tweets or monitor keep on top of a story by monitoring a hashtag.
Drawbacks
Although it can be always on you have to drag down to refresh your timeline. If you want to keep abreast of several areas you have to swipe around. Tweetbot only has column based filtering and searching in the iPad app. Both iOS apps come with a £1.99 price tag. And beware, if you like it and want to start using it on your Mac then it’ll cost you £13.99 – apparently raised by Tweetbot to discourage too many users after Twitter restricted its API. Perhaps because of this, we’re unlikely to see anything developed for Android or PC anytime soon.
Summary
A neat, fast and easy way to keep on top of Twitter on your iPhone.
Rating
![]()
![]()
![]()
![]()
![]()

Journalism Tech Review: Cowbird
History
Cowbird launched on December 8, 2011 and immediately became a place for people from the Occupy Wall Street movement to share their stories. Last year National Geographic used the website to help residents from Pine Ridge Indian Reservation to tell their stories. It's easy to see why it would appeal to National Geographic as it allows you to tell stories with strong images. A few weeks ago it was announced there is now an embed option, allowing you to place your stories on most websites.
In practice
I uploaded a photo and told a small story. Cowbird has a freemium model so one image is the maximum you can upload without paying $60 to become a "citizen". Other advantages of being a citizen is the ability to link stories and further customise your stories such as adding your own handwriting, adding hyperlinks, changing the colour palate and further interacting with the community. But there's nothing to stop you putting different stories in parallel in one post, but if you wanted to use the platform to collect other people's stories around a subject then you'd have to pay. Although the embed (below) is nice, on Cowbird the story fills the screen and has a stronger impact.
The share (or "retelling") facilities are pretty easy for Facebook, Pinterest and Tumblr. Although, as with many inbuilt auto post functions they don't embed natively to their platform or tag properly. I found it nicer to just use the embed function on my Tumblr page for example.
How it helps you
The stories that you can create are best accompanied by strong photo stories. You can also embed audio so there's nothing to stop you from telling media-rich stories. If you do decide to opt for citizenship then this could all be built into the platform and the multipage option would allow you to tell longer stories, even comic strips or data stories.
Drawbacks
All the best functions come at a price. The embed function is good but the mobile interface is less appealing. Although this is probably not the central aim of this site, it would be difficult to collate a breaking news story, as this requires citizenship.
Summary
An intriguing way to tell multimedia stories without learning any HTML.
Rating
![]()
![]()
![]()
![]()
![]()
Journalism Tech Review: Soo Meta
NOTE: Sooo Meta is sooo over.
History
Soo Meta is a browser based editing tool which according to the website blurb allows you to create multimedia stories in minutes.
How it helps you
As well as marketers and educators, this tool was created with journalists in mind "Viewers expect more and more visual content. It’s time to deliver short movies, rich-media stories in your posts! Your audience will love it!" Like with Popcorn Maker the idea is that you enrich your original media by adding more multimedia frills. The video demonstrates how to use the Google bookmarklet to collect words, video and images from around the web, this has the added advantage of allowing you to cite your sources.
In practice
It took longer than "a few minutes" to get to grips with this tool. This is because the demonstration video only shows how to grab material via the bookmarklet, yet it doesn't show you how to install the bookmarklet. Once I'd worked that out I was well into my story. When I attempt to install in Chrome it crashed, I finally installed it in Firefox but was unable to view the video in this browser. I had to complete the edit in Chrome then add the images again (so it carried across the metadata) in Firefox. More than once whilst hopping about I crashed my browser and had to step back.
Drawbacks
Aside from the browser malfunctions, there's very little support for this tool and you are pretty much on your own when it comes to working out what's wrong. Even more unhelpfully if you do try and Google "Soo cut" (the name of the bookmarklet) you get a load of "soo cute" images and chintzy Google apps.
Summary
A great idea which appears simple but can be frustratingly tricky in practice.
Rating
![]()
![]()
![]()
![]()
![]()